Where are my Photos?

Sunday, November 25, 2012

Total Solar Eclipse Photography

I recently had the fantastic experience of being able to view and photograph a Total Solar Eclipse. The November 2012 Eclipse from Port Douglas in Australia.

A little bit of basic info:

A Solar Eclipse is when moon passes between the Sun and Earth casting a shadow on a part of Earth. This shadow follows a path from usually from west to east because from the observer's perspective the Sun is moving faster than the moon. The Shadow is moving at thousands of kilometers per hour across the surface of the earth. It takes approximately 2 hours for the shadow to pass completely over a single fixed location on Earth.

Earth's orbit of the Sun and the Moon's orbit of the earth are not a perfect circle rather they are elliptical (oval shaped) enough so that the apparent sizes of both the Moon and the Sun change. Sometimes the Moon is closer to Earth appearing slightly larger and able to completely cover the the Sun (a Total Solar Eclipse) sometimes the moon is further away and appears smaller than the Sun and does not completely cover the Sun leaving a bright ring. This is an Annular Solar Eclipse.

OK - So what about getting a photo?

The key is to plan well.

The Nov 2012 Total Solar Eclipse was going to take 2 hours from start to finish.

I was hoping to get 5 key shots.
  • First Contact: - The moment just after the moon appears to enter into the sun. 5:44am
  • About half obscure when the moon covers about 50% of the sun. Approx. 6:15am
  • Second Contact: - This at the moment just before Totality when the edge of the sun shines through the edge of the moon. This creates a phenomena called Bailey's Beads or the Diamond Necklace. 6:36am
  • Totality: - The point the Moon totally obscures the Sun. From 6:37am to 6:39am
  • Third Contact: The moment the Sun begins to appear from the other side of the Moon. This creates a similar image to Second Contact. 6:39am
The NASA eclipse website was my starting point. There you can get a schedule of the up and coming events complete with dates, times, locations and maps.

From there I planned a trip to Port Douglas where a work colleague has a unit (condo). Port Douglas was closer to the center line of the path of the shadow and therefore Totality would last longer (2 mins).

One of my big surprises was how popular a Total Eclipse is, according to the local media over 60,000 people came to see this one. This is 4 mile beach at Port Douglas - It is never this popular at 5:45am.

Four Mile Beach Port Douglas

So Tip 1. - Plan ahead.

Next was to think about the gear to take:

I took my Canon 1D-X - its my only body so no debate there. I will say that if you have 2 bodies take them both. There are some interesting shots in the eerie lighting during totality and wider focal lengths. So one on the tripod and one on your shoulder.

The lens I used was a Canon 100-400mm F4.5-5.6 L IS lens. I used it with a 2x Extender III. I used to have a Canon 7D which has a crop sensor (1.6x crop factor) This makes the 400mm focal length on the 7D the same as having a 640mm lens on the full frame 1D-X. To increase the focal length of the 100-400mm lens the 2x Extender gets me to 800mm.

This makes a tripod essential kit for eclipse photography.

Tip 2. Take a tripod.

You also need a filter. I had two but ended up only using one. I have a 77mm circular Black Polymer filter from Thousand Oaks which I didn't use. Instead I use a home made filter using some BAADER AstroSolar Film this should be available from your local telescope supplier. It was interesting to me that traditional camera stores don't carry solar filters. A word of caution. Originally I used this film for the transit of venus earlier this year and made the mistake of taping the film to a clear Cokin filter so I could use my P Series Cokin filter kit. Bad Idea! The film and the filter reflect on each other and you get a double or ghosted image. (See pic below) So this time I made a filter using cardboard tubing and made a cap that fits over the lens. The reason this system works better than the 77mm threaded filter is that during totality you need to remove the filter and shoot with no filter. A threaded filter will take more time and you might lose the shot.

The Black Polymer filter gives the sun a very yellow look while the AstroSolar film give the sun a pinkish to white look.

June 2012 Transit of Venus - The ghosting is from using AstroSolar film over a clear filter. A lesson learned the hard way. 

Tip 3. Get a solar filter and test it before hand.

Planning done, gear packed, tickets booked, alarm set, location scoped - all set.

We were staying 2 mins walk from the location I planned to use. I arrived at about 5:10am before sunrise. Already people were gathering but our part of the beach still had plenty of space.

During the eclipse the lighting was going to change dramatically - I'm using a tripod with a lens that has image stabilisation so it needs to be turned off. (Using IS with a tripod has the opposite effect of moving the image during the time the IS is becoming active.) I chose to use shutter priority (tv) and set the shutter at 1/250th - I would have liked to be faster but with the changing light I would have been under exposed in the darker moments.

The 1D-X allows you to set a maximum ISO and although it is a very capable low light camera I prefer not to let the ISO go over 6400. - Check.

During the eclipse I am continually altering the exposure from under exposed 3 stops to over exposed 3 stops.

The biggest unknown and uncertainty during the shoot is clouds but I knew from my venus transit shots that this might actually give the shot some extra character - which ended up being true.

To top it off - providentially - we had no cloud right at the time of totality and got some great shots.

During Totality the filter comes off and you can shoot without risk of damage to eyes or sensor. I was shooting at f11, ISO 3200 & 1/250th -3 ev

Totality is an amazing event without a camera. You can see the stars and there is this eerie silence, your brain is sending messages that something is weird. If possible everyone should try to experience at least one Total Solar Eclipse in a lifetime. The group next to us had flown in from the USA for this event and obviously didn't share my Christian beliefs, their reaction was to express a desire to sacrifice a chicken. Well thankfully our feathered egg laying friends survived at least until Col. Sanders caught up with them.


The second half of the eclipse was mostly clouded over so I packed up fully satisfied with the results.


So how did they turn out?

Check out the results at this link. vitamirus.me/Eclipse

Here's my favorite.

Photo & Video Sharing by SmugMug


Friday, November 9, 2012

What I learned about cheap studio lighting for beginners

First a disclaimer,

I don't know much about flash photography and after reading this (if you get to the end) you might be in whole hearted agreement.

But I wanted to record what I learned in putting together a cheap lighting setup for a portrait and group gig my daughter and I need to do.

First my gear: I have: A Canon 1D-X, Canon 580 EX II Speedlite. I also have a selection of lenses that should do the job. My daughter has a 60D and a 320 EX Speedlite.

What I didn't have: A backdrop, any way to defuse the flash light and a way to trigger the flashes off camera.

I don't really like portrait photography. I guess this is mainly because I'm not that good at it so I didn't want to spend a fortune on stuff that I might not get a lot of use out of. The short part of a long story is that this shoot is for my other daughter's dance school and parents are expecting a semi professional result so certainly wanted to give this my best shot. (no pun intended).

After searching ebay for a background I settled on a 2m x 2m frame and white background. I'm hoping to get a high key look by overexposing the backdrop with a Speedlite behind the subject.

Lesson: Be skeptical about buying stuff on ebay. I usually am very careful but for AUD 36.00 I thought not much to risk. Sure enough the frame was as expected cheap but functional. The backdrop was about 1.5m x 2.0m nothing like the picture on ebay and next to useless. I agreed with the seller to a AUD 10.00 refund and I keep the backdrop. So for AUD 26.00 I have a 2m x 2m frame. I paid another  AUD 33.00 for a much larger background that will curve at the bottom.

Next I bought an umbrella setup from DCW (Digital Camera Wharehouse) http://www.digitalcamerawarehouse.com.au for AUD 175.00 It's a pretty good setup that allows you to mount hot shoe flashes on the stands and reflective umbrellas to defuse the light.

I wanted a left and right flash to light the subject and another light for the background. I already had the 580EX II and my daughter's 320 EX so I bought (again on ebay) another 320 EX to match my daugther's. These Speedlites can act as a slave not a master. The Flash cost AUD 209.00

I still need a way to fire the Speedlites so after some research I settled on a Yongnuo ST-E2 remote trigger. This is a rip off of the Canon trigger at half the price. There was some concern that the Yongnuo would not fire the 320 EX but I couldn't see any reason why so I took a punt (that's a bet or gamble for my non-Aussie readers) and bought it. Well it fired the 320 EX fine but would not sync properly with the Canon 1D-X I found out later that the unit does not work with the 1D-X or the 5D Mk III. The seller willingly agreed this was reason enough to take it back and agreed to a full refund. The Yongnuo unit was AUD 132.00

Plan B. I thought I'd try the Hahnel Tuff TTL transmitter / receiver. My setup though required 3 receivers which was starting to push the budget. So an idea formed in my ignorant brain that I could use the Hahnel to trigger the 580 EX II in Master mode and as Master it would trigger the 2 Canon 320 EX's. I called DCW twice to ask if this would work. One said "yes" the other "no" so that wasn't going to help. I took another punt and put down the AUD 156.00 for the transmitter receiver kit. Sure enough it works fine. The Hahnel fires the 580 EX II which is set to master and in turn fires the 2 x 320 EX's. An added bonus with the Tuff TTL kit is that it takes AA batteries the same as the flash units. Job done.

The 580 EX II seems to blow out the background for the high key effect which is what I wanted so we are all set for the shoot.

In the end I got a background kit, new Canon 320EX flash, 2 strobe umbrella lighting lit and a wireless trigger system for AUD 566.00 - I'm happy with that.

So what did I learn?

1. eBay is OK for buying gear but a reasonable element of skepticism is required. Buyer beware.
2. The Yongnuo ST-E2, although a good unit that seems to work as designed, does not work with the Canon 1D-X. The flashes will fire but are out of sync so its is effectively useless for 1D-X owners.
3. The Hahnel Tuff TTL transmitter works well and I can confirm if one of your flashes can act as a master then it will fire other slaves so you don't need more receivers. I cannot confirm that you get all the E-TTL functionality across the system so advanced users may not be satisfied. So far I am.

I'll let you know after the shoot.


Wednesday, September 26, 2012

Memories are important

One of the things that's keeps me taking photos of people is the thought that one day that memory will be important.

I've had two occasions in the last week that have reminded me of this.

1. My youngest daughter turned 18 so it fell to me to put together a slideshow of her first 18 years for use at her party. As I am putting this together I'm reminded of the many occasions where I didn't take pictures and could have.

2. One of my very good mates died last week, the funeral was yesterday. Cancer took him far too early. As far a funerals go this was one of the most uplifting I have been to. During his last months we spent a bit of time together and because of our mutual interest in photography we often had our cameras. I regret not taking more photos of him. It's not a very blokey thing to do - taking pictures of your mates. But from this vantage point that was a short sighted perspective - He was much loved and will be missed. Photos are helpful in revitalising memories and grieving well for those who have passed.

So don't be shy - take your camera, use it and store up memories of your loved ones.

I also gained a new appreciation for the face recognition features of Aperture. It was useful to be able to quickly find photos for use in celebrating his life.

There's a good article on this topic on DPS today.

Sunday, September 2, 2012

Composition - Use your eyes there is always a photo to take.

Yesterday I needed to get the car washed - It was the first sunny day we had had for what felt like a month and the car needed it.

So with a long queue at the car wash and 40mins to kill I dropped the car off. Fortunately I had the 1D-X and our new Canon 70-200mm f2.8 L IS Mk II clipped in.

The car wash is at the end of a light industrial area that is uninteresting and bordering on neglect but I have learned that there is a photo in every location. Just open your eyes and use your imagination.

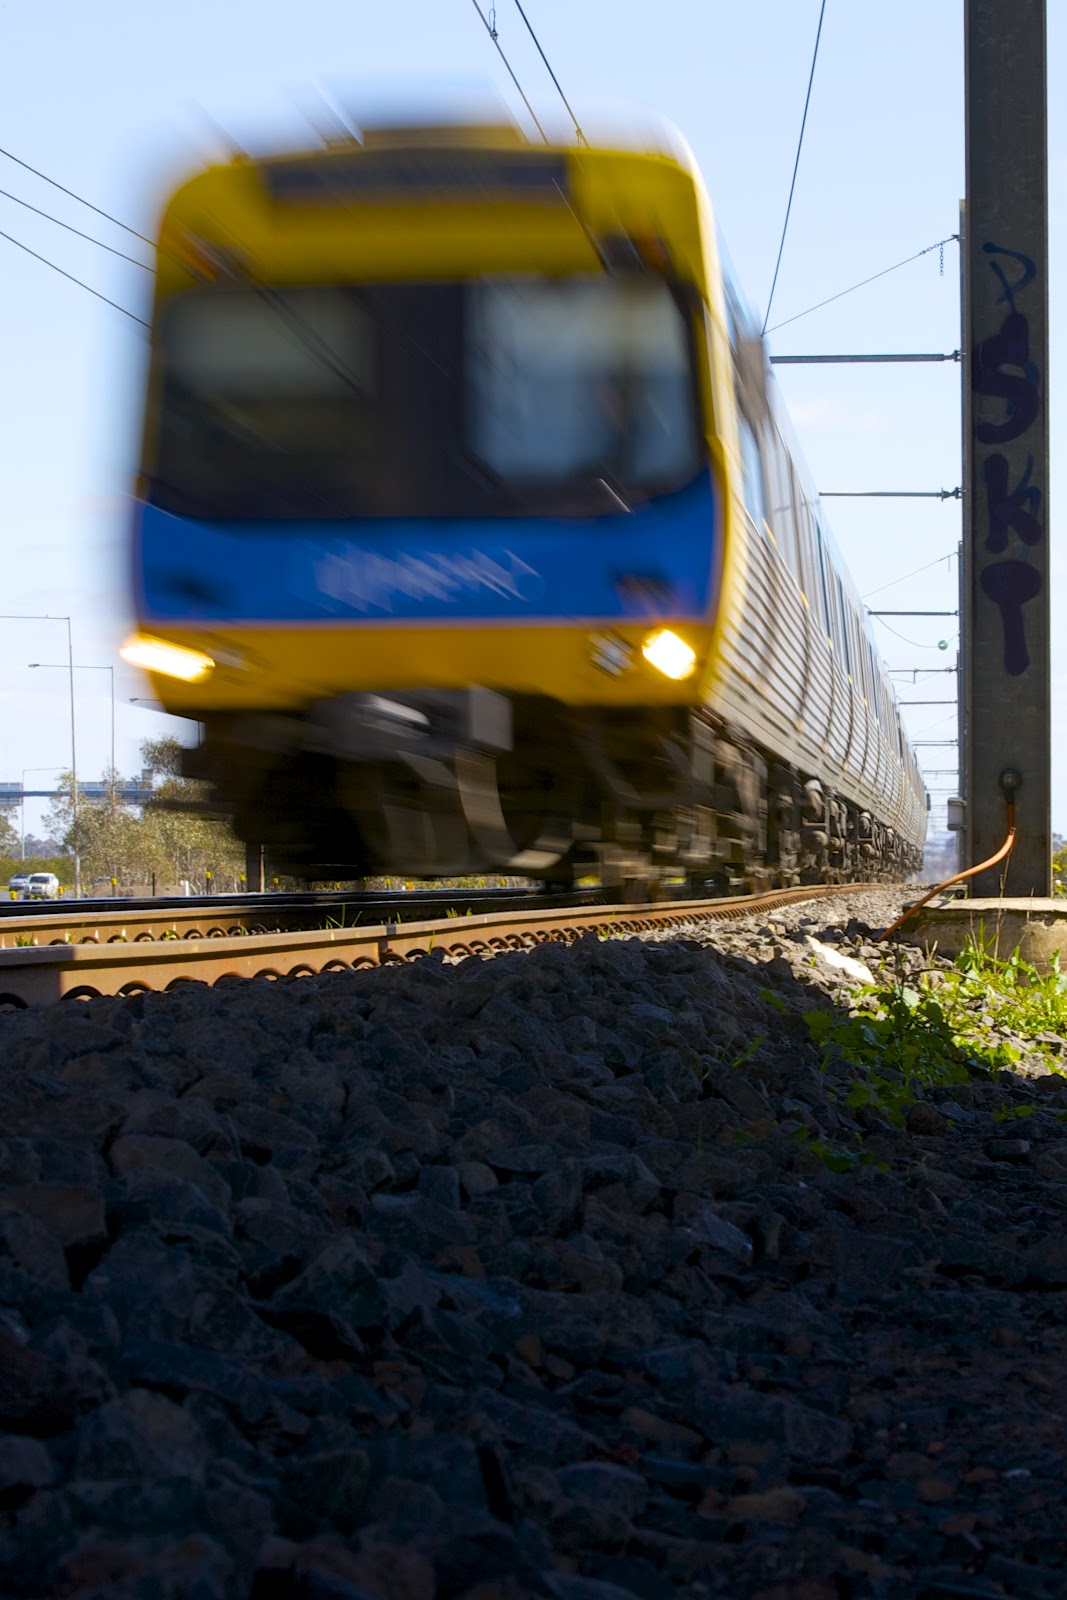
I thought I'd walk over the the railway line to get some passing trains, graffiti and whatever else I came across.

Now don't get me wrong - I took about 80 shots and only kept 18 so there was plenty experimentation.

But this shot is my favorite:


Yes there has been a little post processing:

Dropping saturation and reducing exposure on the left side as well as sharpening the prickles and the flower. Extra blur around flower.

But the composition is straight off the camera.

Here are few of the other keepers.


Saturday, September 1, 2012

1D-X AF Tracking - Model Plane photography

A mate of mine asked me to go with him to take some pics of a model plane in flight he was doing a review of.

So grabbed the 1D-X and set off in his car. He is a professional photographer so I asked him what setup he would use for this.

400 ISO Shutter Priority set to 1/500th Evaluative Metering. The 1/500th speed was to stop the plane but still showing some motion in the propeller.

Sun was low in the sky so the plan was for some low passes with the sun behind us.

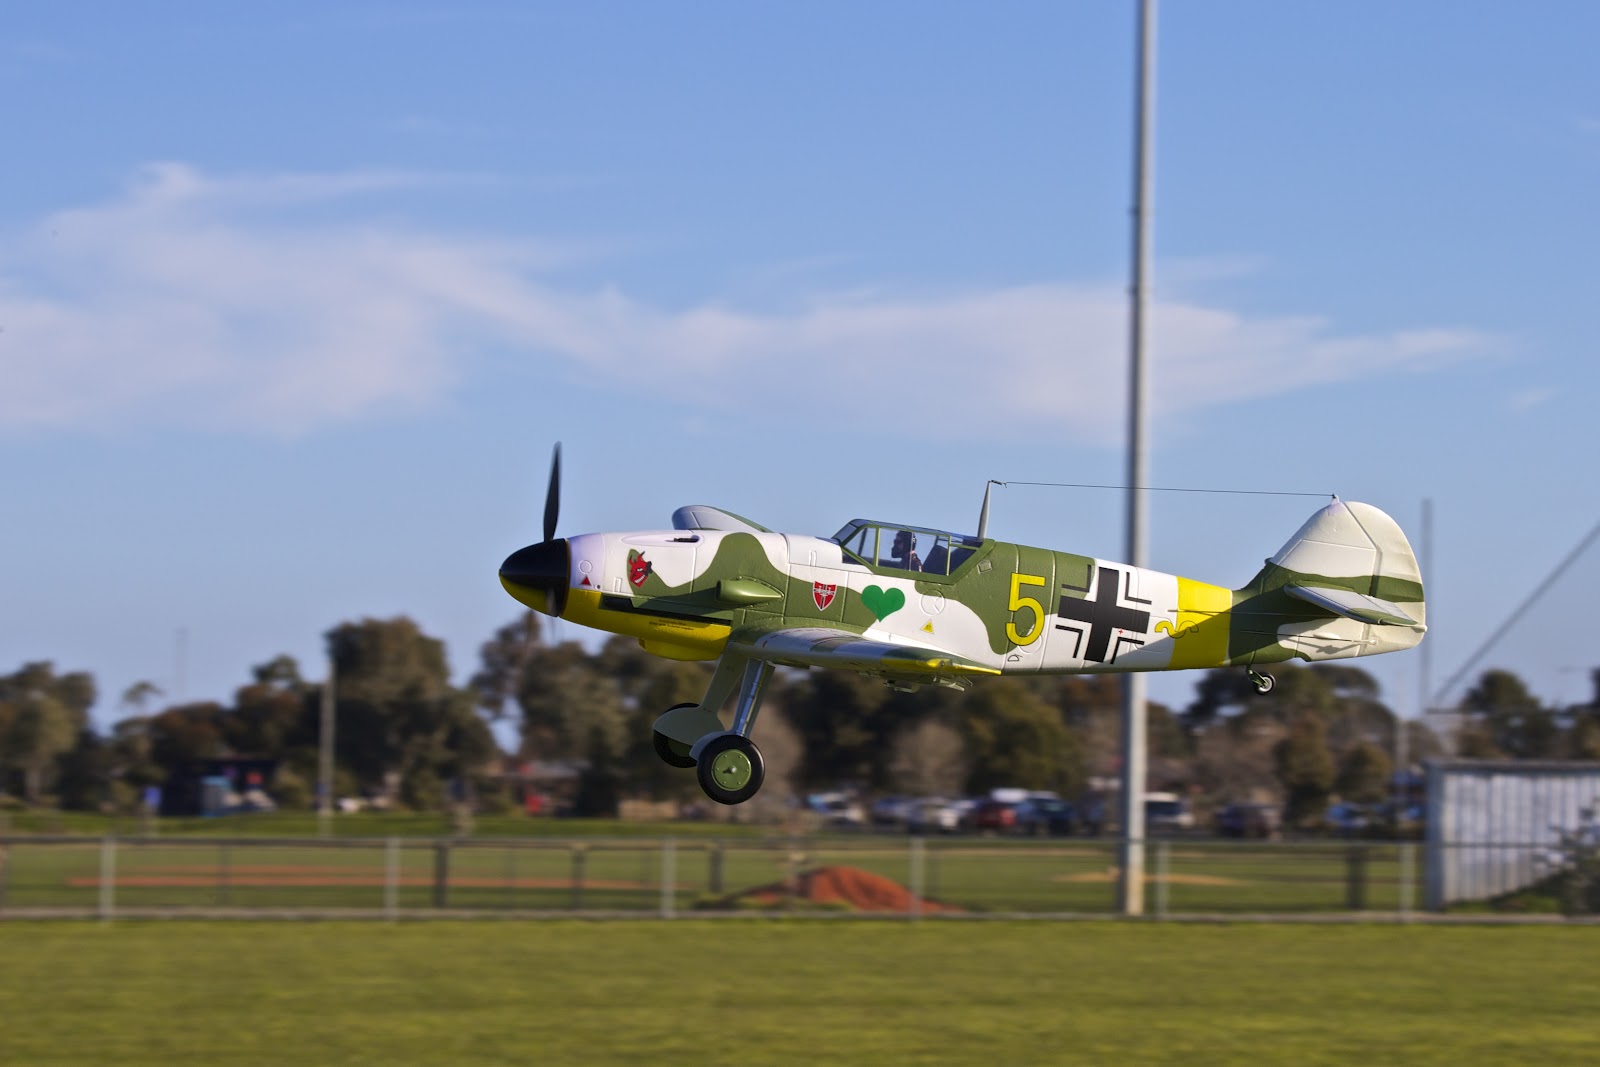
The Model is a BF109 whatever that is. Look it up.

I set the AF to AI Servo.

The 1D-X was attached to a Canon 100-400m L IS F4-5.6. It was the first time out with this combination and I immediately noticed the loss of the 1.6 crop factor from the 7D.

Also set the camera for high speed burst and we are ready to roll.

The thing with Model Plane photography is to try and photograph the model in life like situations. These models are "scale" so you are trying to simulate some realism in the shoot.

Not that easy when these things are buzzing around so fast.

The verdict? The AI Servo on the 1D-X works very well. Its fair to say that this job wasn't an extreme test for the AI Servo mode I shot over 200 frames and most of them were acceptable. With 55 of them printable.

Here's a few of the best.


Friday, August 31, 2012

1D-X Firmware Upgrade 1.0.6. Installed

Canon issued a firmware upgrade for the 1D-X on August 28, 2012.

http://www.canon.com.au/Support-Services/Support-News/Firmware-Updates/EOS-1DX-Firmware-Update

The upgrade fixes:

1. A bug that stopped some micro adjustments being saved.
2. Some back focusing issues when used with some lenses.
3. The Error 80 Issue.
4. A problem with the dual CF cards when one is pulled out and reinserted.
5. A bug where micro adjustments are not recorded properly in the EXIF data.
6. or adds a feature that displays a "O" or "X" to indicate a file transfer working using WiFi FTP.

No problems upgrading. Need to check any improvement with the focusing.

Saturday, August 18, 2012

Canon 100-400mm f4.5-5.6 IS L v 70-200mm f2.8 IS II L + 2x Extender III

Just picked up a new Canon 70-200mm f2.8 IS L II Lens and was keen to try it out with the Canon EF 2x Extender III.

First things first.

1. It fits. Some have suggested the extender doesn't fit this lens. It does.
2. The AF works fine on the 1D-X body. Unlike using the extender with the 100-400mm L Lens the AF works fine on the 70-200 its quick and sharp. I tried it on the 7D and can confirm the AF is a lot slower - It does a lot more hunting for focus.

So what about image quality?

Here's the 100-400 at 400mm ISO 800 and 1/6 sec f5.6

Here's the 70-200 at 200x2 = 400mm ISO 800 and 1/5 sec f5.6 (The extender reduces the aperture by 2 stops)


Hard to pick the difference.

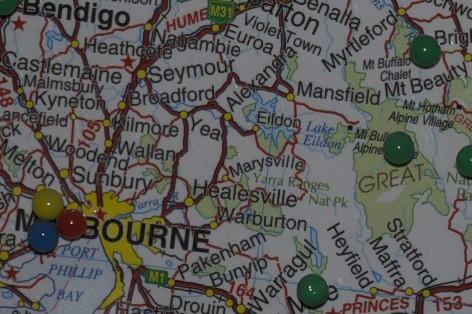
Here are 2 shots on a tripod at 100% crop this time shooting at ISO 100 1/250 with a speedlite.

The 100-400


The 70-200 with 2x Extender


The 70-200mm with extender doesn't look as sharp as the 100-400mm? But wait.

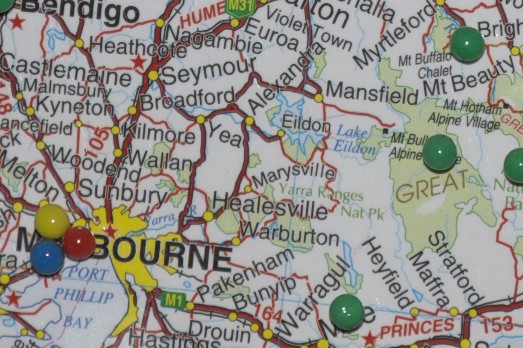
You will notice the images cover the same area of the map yet one is smaller than the other. The camera body sits closer to the subject when the 100-400mm is being used on the tripod because the tripod foot on the lens sits closer to the body of the camera. The 2x Extender has the effect of putting a spacer between the back of the lens and the camera - pushing the body back. This wouldn't have been the case if I had fixed the tripod plate to the body rather than the lens foot.

So lets do that again. This time the Body is fixed to the Tripod.

100-400mm

 70-200mm + 2x Extender

Can't split them?

Here's a 200% crop side by side. the 100-400mm is on the left. The 70-200mm + 2x Extender is on the right.


So the 70-200mm with 2x Extender on the 1D-X could replace the 100-400mm at full zoom. The downside with that setup is that 250mm the 100-400 is at f5.0 where as at 125mm 2x = 250mm the 70-200mm with 2x Extender will be at f5.6 - Admittedly not a big sacrifice if you can't afford the 2 lenses.

I will be keeping my 100-400mm for now. With the 2x Extender on that I get a 200-800mm Lens and on the 7D (Although I have to use Manual Focus or Live View AF) I get a whopping 1280mm. Even at f11 this is a very credible and affordable Super Telephoto option.